
Every post in this series so far has ended in the same place: mill the berry fresh, right before you bake. And every time, a very fair question follows — okay, but how? What do I actually need sitting on my counter to do this?
Less than you think. Milling at home is not a homestead project and it doesn’t need a special room or a big budget to start. It’s one tool, one bag of berries, and about a minute of noise before you bake. And this is the one change that changed my baking the most. Let me walk you through starting, step by step.
What you actually need to start
Here is the whole starter list:
- A way to grind the berries — a home grain mill (more on choosing one below)
- Wheat berries — one bag is enough; hard white wheat is the friendliest first berry — you can also add soft white for cookies and muffins
- One easy first recipe to start with — waffles, muffins, or cookies, not your most ambitious loaf
That’s it — a way to grind, a bag of berries, and one easy recipe to start with. No special flour, no sourdough starter you have to keep alive, no new oven.
A kitchen scale and airtight jars or food-grade buckets are good to have — fresh flour does behave best when you weigh it, and berries keep nicely in jars — but they are not essential to start. Skip them for now if you don’t have them. You can freeze extra flour in a zip bag while you’re learning, and add the nice-to-haves later.
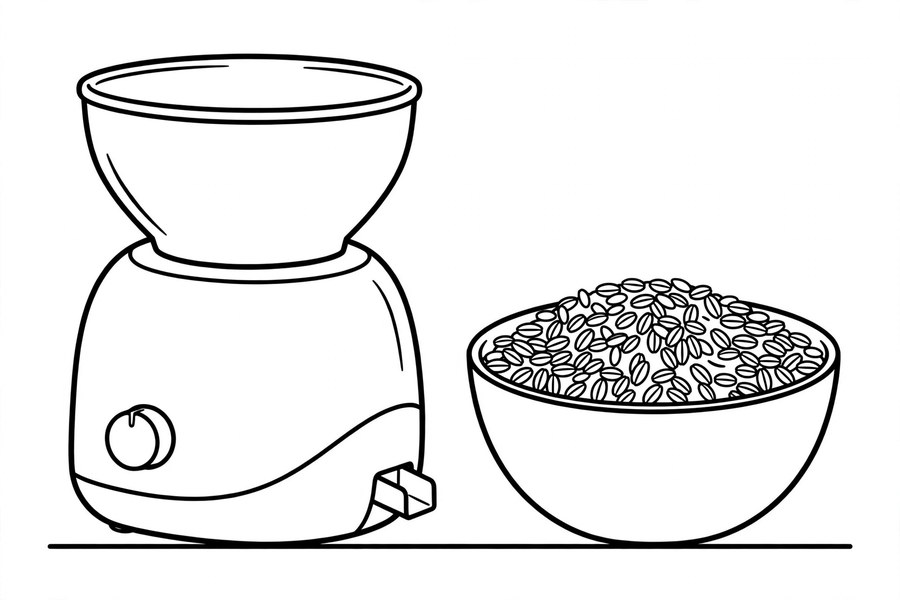
Do you really need a grain mill?
For freshly milled flour, yes — some way to grind the whole berry is the tool that makes this whole way of baking possible. Wheat berries are hard little seeds, so they need a tool made for grinding them into flour.
A few notes before you shop:
You don’t need the fanciest mill to start. I didn’t start with one — I got a second-hand mill, ordered my first grain, and started learning one loaf at a time. What matters is picking a mill you will use every week.
And check Facebook Marketplace before you buy new. That’s where I got one of my mixers — that mixer sells for $300, even now, and I got it for $40, and it had never been used — it was new!! So try your luck there first. Good equipment turns up there all the time, and somebody else’s unused mill or mixer can be your very inexpensive start.
A high-powered blender or coffee grinder can mill small amounts in a pinch — it’s noisy and slow. Try a small batch that way if you want a taste first. But for regular baking, a dedicated mill is worth it.
A hand mill exists, too. It’s a good workout and it works without electricity — but unless you specifically need that, an electric mill is worth it. Your arm will thank you, and you will mill much more often.
The main kinds of home mills
There are three types of mills — stone, impact, and hand mill — and home bakers mostly choose between the first two:
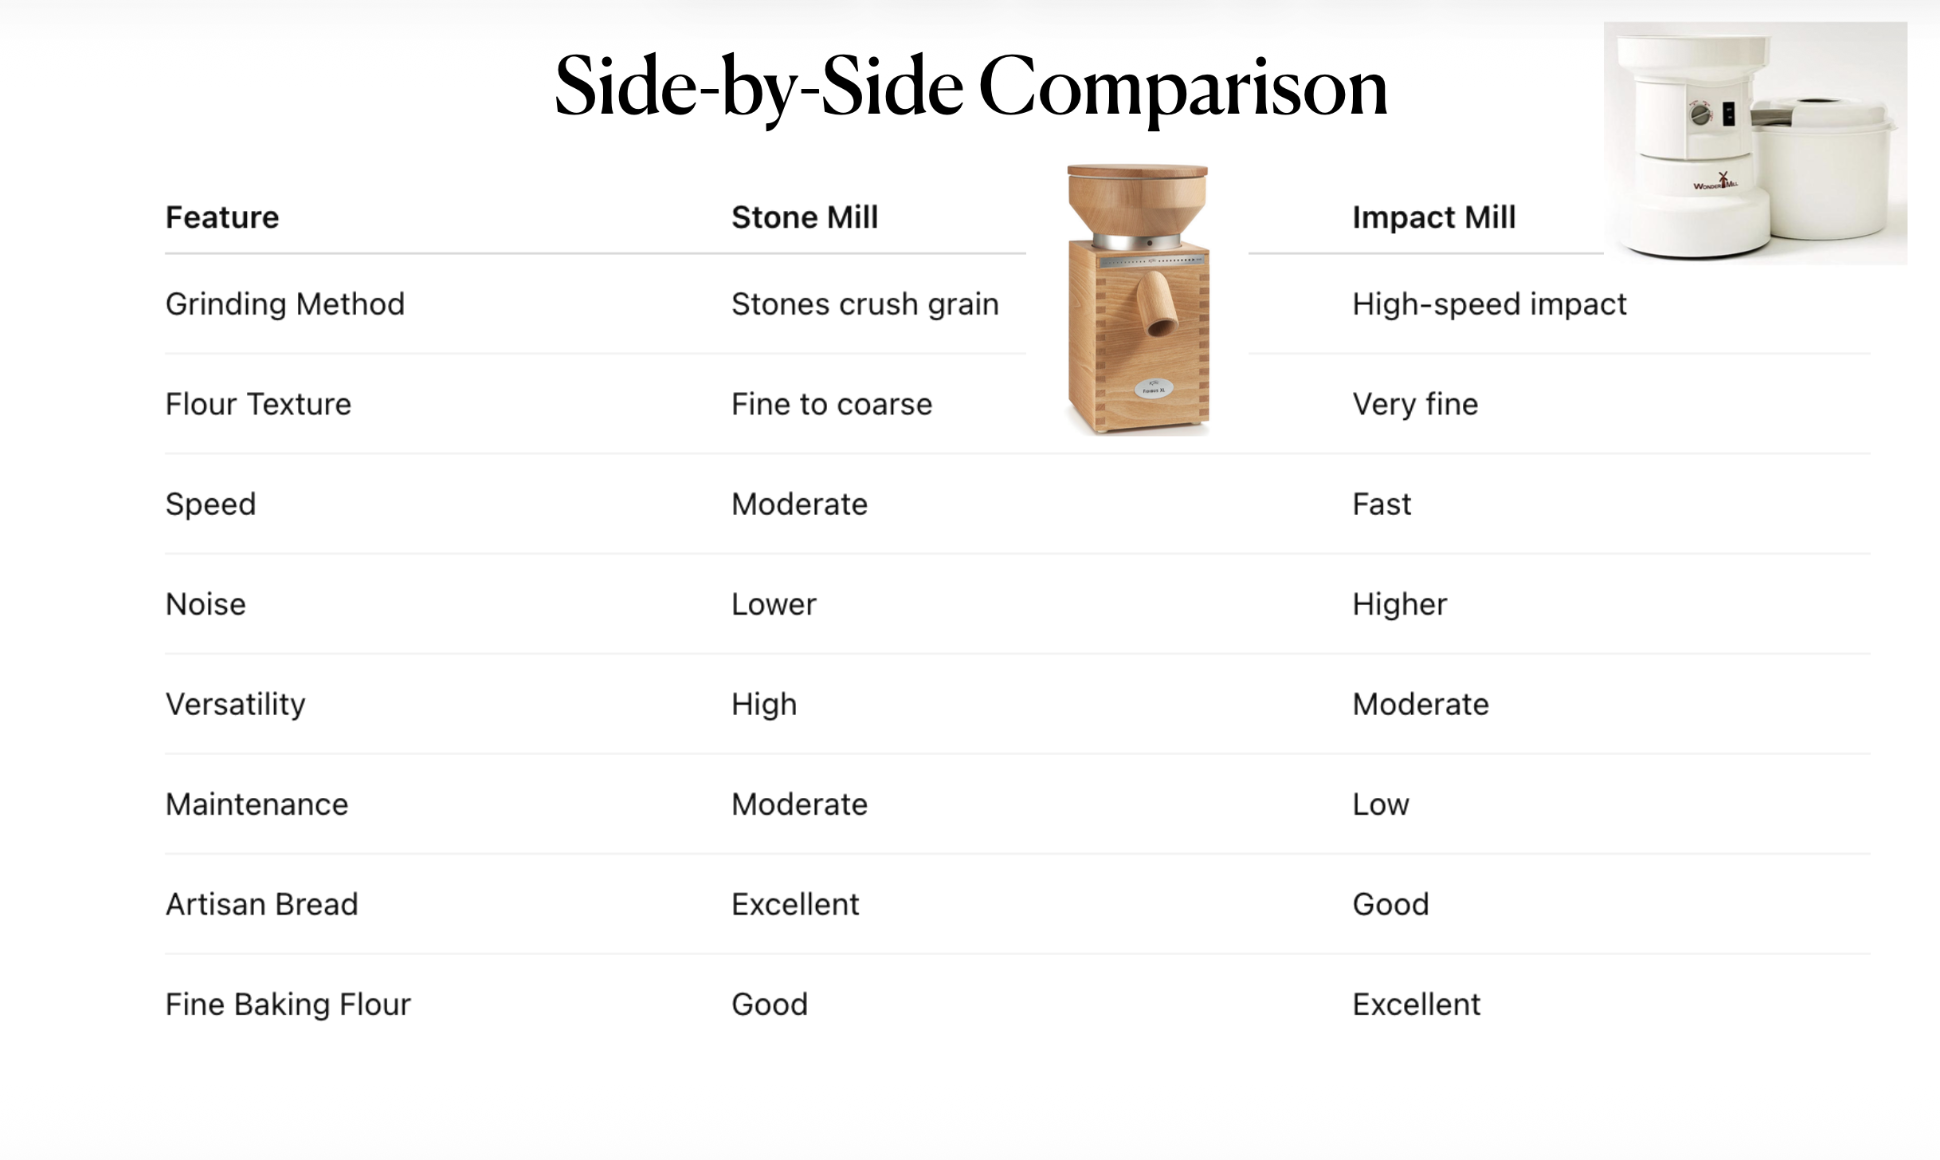
Stone mills grind the grain between two stones, and you can adjust the fineness from coarse to fine. They run quieter, with a lower hum, and bakers who mill a variety of grains and love rustic, artisan textures often land here. The stones can glaze over time, so they ask for occasional cleaning. You can get one of those on Amazon, too — the NutriMill Harvest Stone Grain Mill is the stone mill I recommend.
Impact mills — the WonderMill is the one I use, and it’s the mill in my own kitchen — use high-speed stainless steel fins to shatter the grain against a ridged chamber. They are fast, they give a very fine, consistent flour, they keep the flour cooler, and upkeep is simple: brush out the chamber. They are louder — think vacuum cleaner — for the short minute they run. You can get one of those on Amazon, too — the NutriMill Impact Compact Electric Grain Mill.
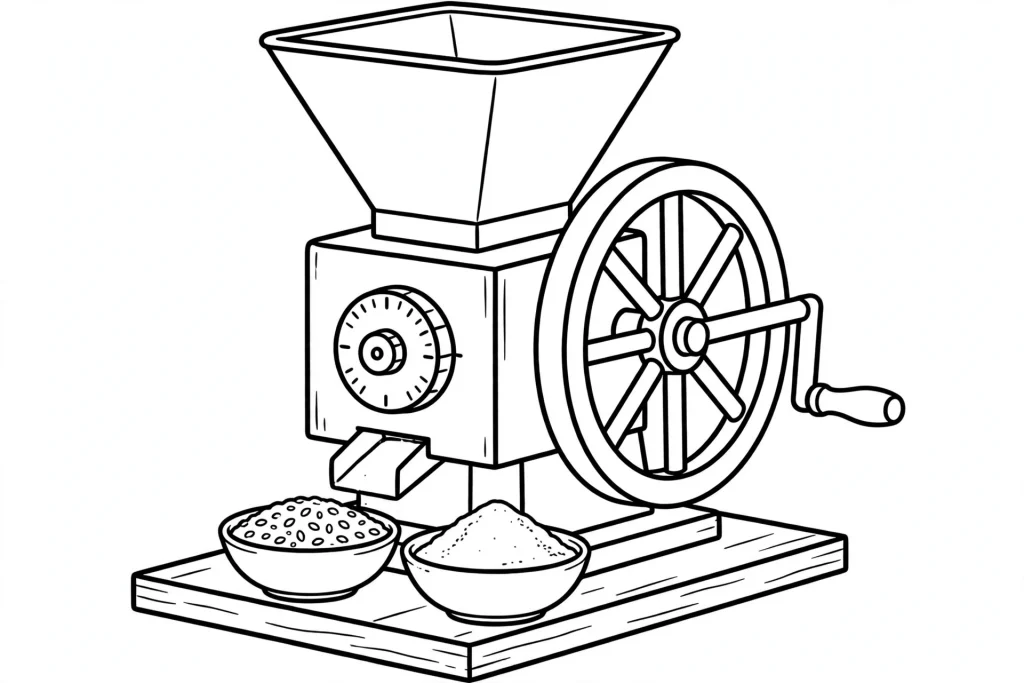
Hand mills, also called burr mills, are the third route. You turn a crank by hand, and the grain is crushed between two grooved metal plates. The mill clamps right onto your counter or table, a dial lets you adjust from coarse to fine, and there is no electricity involved at all. They are quiet and the least expensive way to start milling — the trade-off is your arm: milling a big batch for bread takes time and effort, so most people use a hand mill for small amounts and move up to an electric mill when milling becomes a habit. You can get one of those on Amazon, too — the Kitchen Crop Hand Crank Grain Mill has stainless steel plates and adjusts from cracked grain to fine flour. And if you have a KitchenAid mixer, the most economical way to start is a grain mill attachment made for it — the Grain Mill Attachment for KitchenAid Stand Mixer.
Here’s the comparison I give beginners — the two mills most home bakers choose between, side by side:
Stone mill or impact mill? Neither one is ‘best’ — it depends on how you bake.
Three questions to ask before you choose
- What’s my budget? Decide your range first. Both stone and impact mills make excellent flour — this is a priorities choice.
- How often will I bake? Baking every week? A stone mill’s adjustable fineness earns its keep. Baking a loaf or two on weekends? An impact mill’s speed and fine flour are hard to beat.
- What textures do I want? Impact mills give a consistently fine flour. Stone mills adjust from coarse to fine, which matters if you want cracked grains and rustic bakes as well as bread flour.
Before you buy, also check the practical things: capacity, warranty, cleaning steps, which grains the maker approves, and whether the noise level fits your kitchen and your mornings.
Your first milling day, step by step
This is genuinely all there is to it:
- Weigh or measure your berries. Mill a little more than the recipe needs — a spoonful extra is better than a spoonful short.
- Set the mill to fine for breads, cakes, and everyday baking.
- If you’re using an impact mill, turn it on before pouring the grains in. Don’t forget this one — an impact mill needs to be running first, then the berries go in.
- Pour the berries in and mill. It takes about a minute. The flour that comes out is warm, soft, and fragrant.
- Measure your flour for your recipe (if you want to be precise, use the scale), rather than scooping it — freshly milled flour is fluffy, and scooping packs it down.
- Use it the same day if you can. Mill in the morning, bake when you’re ready.
My suggestion for a first bake is the waffles from my mini-course — they are easy to make, hard white wheat gives you crisp edges with structure, and you taste the difference in the very first bite: Waffles with Freshly Milled Flour.
Cookies work as a first bake, too. For my barley cookies, I bought just one bag of barley at our local store, Fresh Farm, milled it fresh, and baked cookies. Start small like that — one bag, one recipe — and see how it tastes in your kitchen: Healthy Chocolate Chip Barley Cookie Recipe
Storing berries and flour — berries last, flour doesn’t
This is the habit that makes home milling easy instead of fussy:
- Berries: keep them in airtight jars or food-grade buckets, cool and dark. Stored that way they keep for months, even years — nature packaged them to last. A bay leaf or an oxygen absorber helps keep pantry pests away.
- Milled flour: use it as soon as you can, or freeze it in a zip bag and use it within one to two months — no special container needed. The freshness window is short because the germ’s natural oils start to oxidize the moment the berry is cracked open — that’s exactly why we mill close to baking.
- Mill small and often: mill only what you’ll use soon. Berries store better than flour.
- Label everything: grain, date milled, use-by.
Where do you buy berries? Start simple — one wheat, from a source you trust. For my first recipes, before I knew where to order, I ordered from Amazon: five pounds of hard white wheat and five pounds of soft white wheat, both from Palouse Brand — it was the easiest way to get started. (As an Amazon Associate I earn from qualifying purchases.) Then, when you learn more, you can choose from one of the suppliers I use now: I buy my hard white wheat berries from Grand Teton Ancient Grains, my regular source. Other options are Azure Standard, Bread Beckers, Pleasant Hill Grain, co-ops, and good health-food stores. Start with a small bag, mill a test bake, and taste before you stock up.
One habit that fixes half of all first-loaf surprises
Fresh flour drinks differently from store flour. It absorbs liquid slowly, and it keeps drinking as the dough rests.
So: weigh your flour, add the water, mix — then let the dough rest 20–30 minutes before you judge it and before you add any more flour. Then adjust after a few minutes, once the flour has had time to drink: if it’s still too wet, you can always add a little more flour, and if it’s too dry, add a little more water. Half the “my loaf was too dry / too sticky” stories I hear are really “I judged the dough in the first minute.” Give it its rest, and it calms down.
I go into this in my mini-course — there’s a lesson on hydration differences when you bake with freshly milled flour, because this one habit changes so much.
Baking with freshly milled flour?
If you’d like the whole beginning in one place — choosing a mill, buying and storing grains, the hydration habits, and your first breads, bagels, and waffles — I put all the knowledge I gained into my Freshly Milled Flour Basics mini-course, where I share it step by step.
👉 Learn more about the mini-course here: https://eva-riazati-food-photography.myshopify.com/products/freshly-milled-flour-basics-mini-course
Freshly Milled Flour Basics — Mini-Course
No pressure at all — start with one small bag of berries and one easy recipe to start with, and see how it tastes in your kitchen. That’s how I started, too.
Frequently asked questions
How long does it take to mill flour at home?
About a minute for a typical recipe batch. The mill is loud for that minute, and then you’re baking. It is much faster than most people picture.
How much flour do I get from a cup of berries?
Roughly — a cup of wheat berries mills into a little more than a cup of flour by volume, because the flour is fluffier. That’s why I weigh: milling about 1⅓ cups of hard white berries gives me about 2 cups of flour for my waffles.
Can I mill a big batch and store it like store flour?
You can store extra, sealed, in the fridge or freezer and use it soon — but the point of home milling is freshness. Berries store for months or years; flour is at its best in the first days. Mill little and often.
What if I don’t want to buy a mill yet?
Try a small amount in a high-powered blender or coffee grinder first, or start with a mixer attachment. If you find yourself milling every week — and most people who taste it do — a dedicated mill earns its counter space quickly.
Is milling at home expensive?
The mill is the one real purchase; after that, wheat berries themselves are an everyday pantry ingredient, and you only mill what you use. Starting second-hand, like I did, is a perfectly good way in.
Which berry should a beginner buy first?
Hard white wheat. It’s mild, a little sweet, strong enough for bread, and gentle enough that your family’s first loaves taste familiar. Add soft white next for cakes, cookies, and muffins.
Want to learn more about grains and milling?
If you’d love to go deeper, I have my Freshly Milled Flour Basics mini-course — 8 lessons where I cover the basics, step by step: how to choose a mill, where to buy berries, getting to know the grains, the difference between hard and soft wheat, and which grain to use for which baking. If you’re interested, you can find the course here: 👉 https://eva-riazati-food-photography.myshopify.com/products/freshly-milled-flour-basics-mini-course
Tell me in the comments: what’s holding you back from milling at home — the mill, the berries, or just not knowing where to start?
Happy baking, friends! 🌾
Leave a Reply